Surround Sound Speaker Placement Guide
Want to get the absolute best performance out of your home cinema system without spending a penny on new gear? It all comes down to speaker placement.
When speakers are misaligned, dialogue smears and bass becomes muddy. In this Surround Sound Speaker Placement Guide, we cover the essential rules of speaker positioning. Learn how to dial in the perfect heights, balance your subwoofer, and map out the exact angles for 5.1, 7.1, and Dolby Atmos height channels to get professional-grade sound right in your room.
1. Standard 5.1 Surround Sound
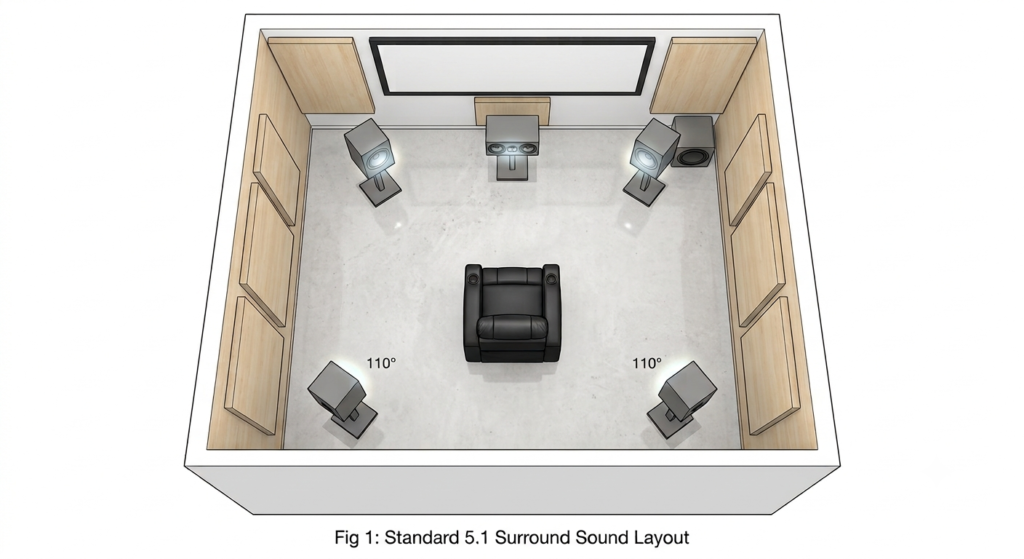
The foundation of modern home theater. A 5.1 system uses five discrete channels and one low-frequency effects channel (the subwoofer).
Placement Notes:
- The front three speakers (Left, Center, Right) are angled towards the primary listening position (PLP).
- The two Surround speakers (SL, SR) are placed to the sides, slightly behind the listener (ideally 110ยฐ from the front centre), and angled inward.
- The Subwoofer (.1) is often placed in a front corner for maximum coupling.

Fig 1: The standard 5.1 layout establishes the listener’s relationship with the listener’s chair (sweet spot), the screen, and the foundational surround speakers.
For more in-depth information on speaker placement, please visit Dolby or download the Dolby 5.1 Home Cinema Speaker Guide
2. Standard 7.1 Surround Sound
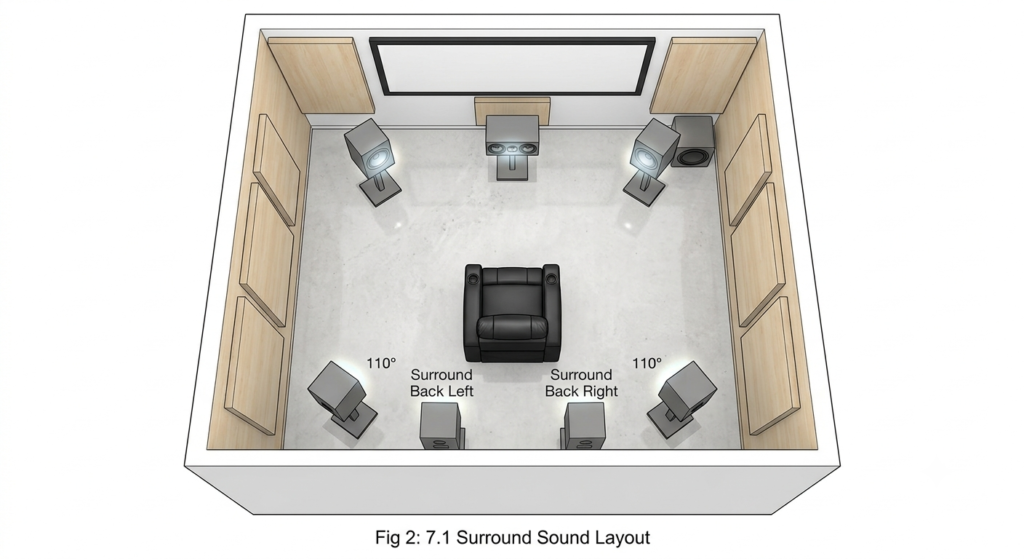
The 7.1 system enhances the rear sound field by adding two additional speakers behind the listener.
Placement Notes:
- This layout builds directly upon the 5.1 foundation.
- The Side Surrounds (SL, SR) remain in their 110ยฐ positions.
- Two Surround Back speakers (SBL, SBR) are added to the rear wall, positioned symmetrically behind the listener, firing forward. This provides a smoother transition for sounds panning from front to back.

Fig 2: The 7.1 layout introduces the ‘Back Left’ and ‘Back Right’ speakers to the rear wall, filling in the sonic gap behind the listener.
For more in-depth information on speaker placement, please visit Dolby or download the Dolby 7.1 Home Cinema Speaker Guide
3. Standard 9.1 Surround Sound
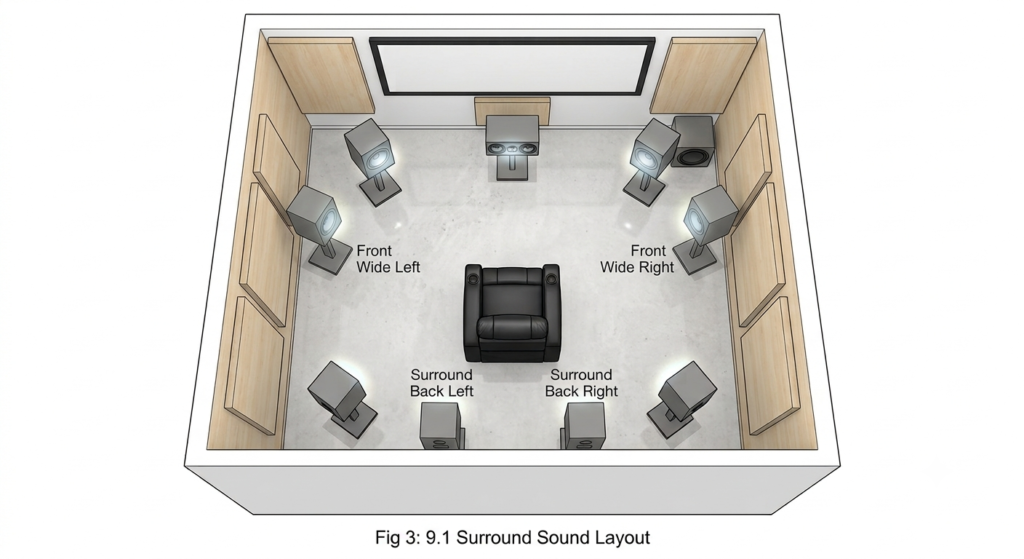
The standard 9.1 system (pre-Atmos definition) expands the width of the front soundstage, prioritizing lateral seamlessness over height.
Placement Notes:
- This layout keeps all eight speakers from the 7.1 system.
- Two Front Wide speakers (FWL, FWR) are added to the side walls, positioned between the Front L/R and the Side SL/SR.
- These Wide speakers are angled sharply backward toward the listener, pulling the front imaging wider and seamless. Note: In some vintage definitions, 9.1 utilized Front Height speakers instead of Wides, but the modern ‘Wide’ placement is shown here to define the full horizontal plane.

Fig 3: The standard 9.1 layout adds ‘Front Wide’ speakers (angled on the side walls), creating the maximum possible horizontal speaker layer.
For more in-depth information on speaker placement, please visit Dolby or download the Dolby 9.1 Home Cinema Speaker Guide
Standard Surround Sound Speaker Connection Plates
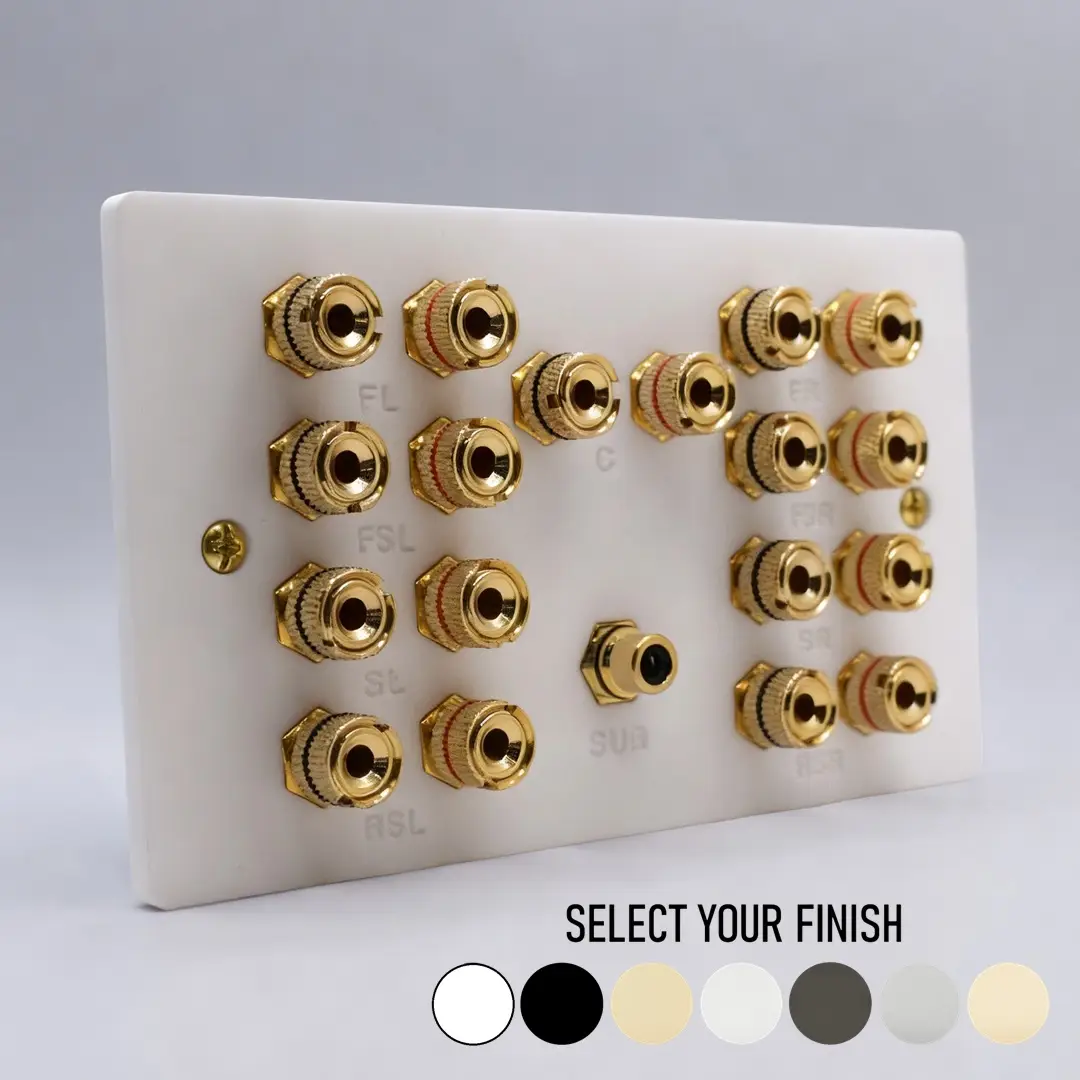
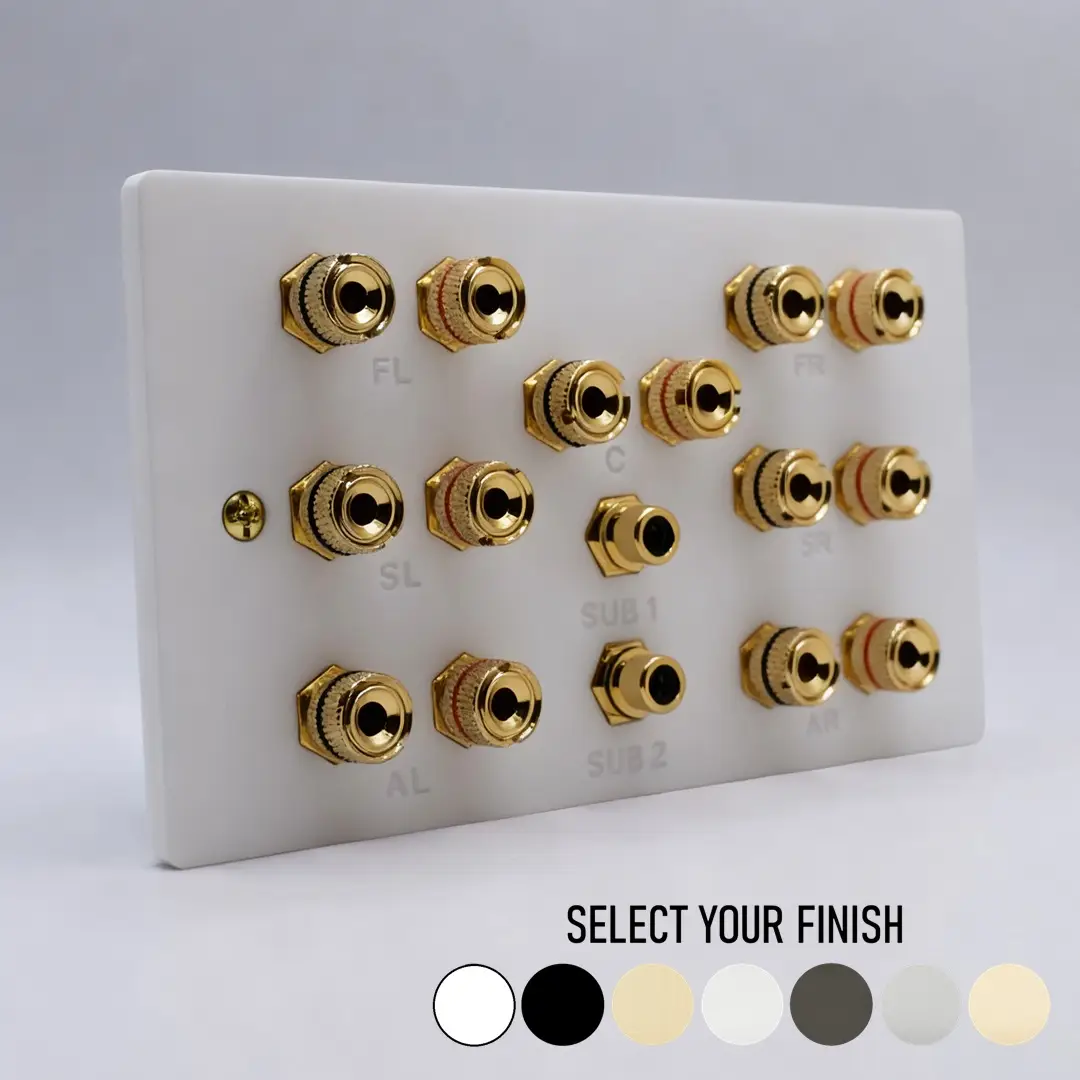
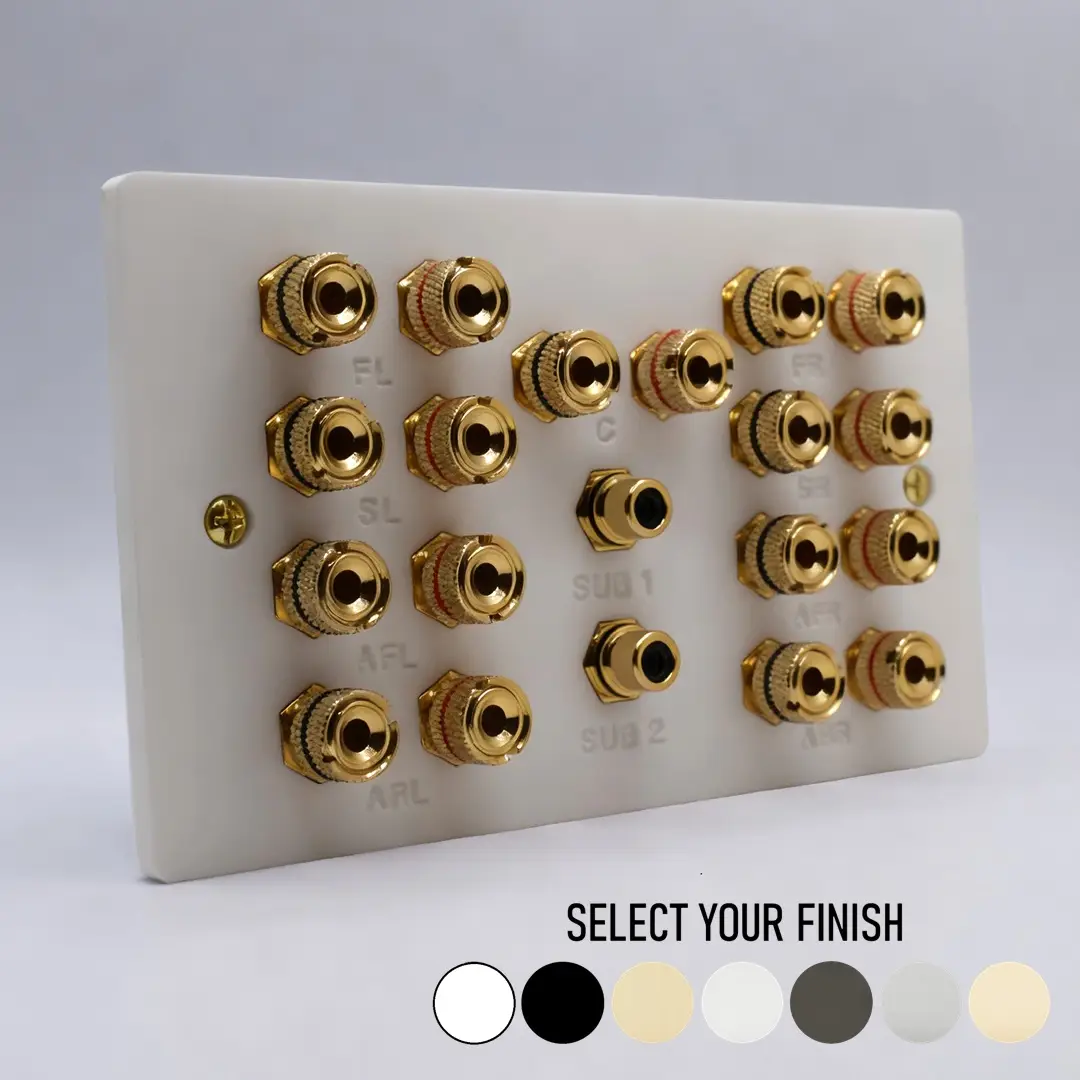
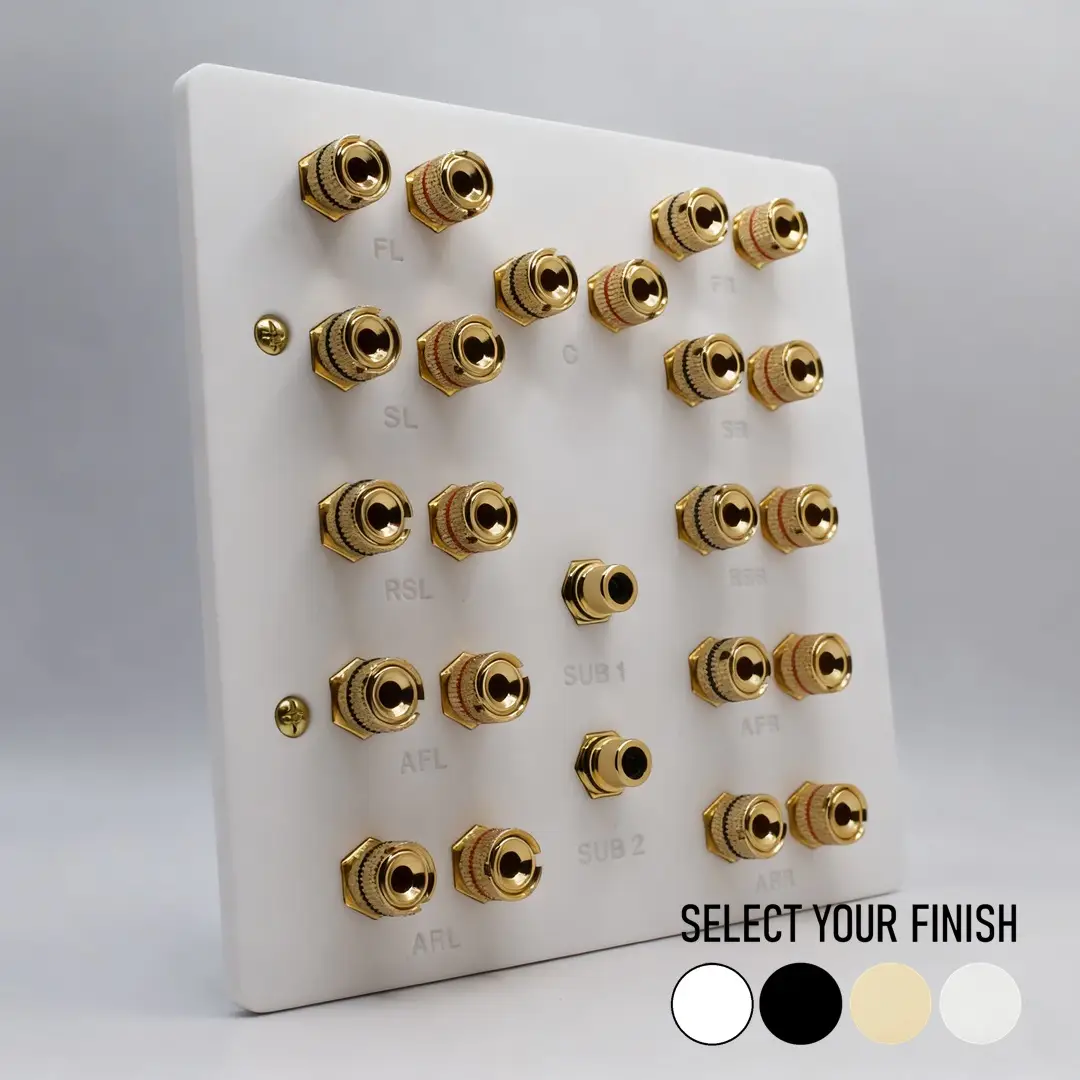
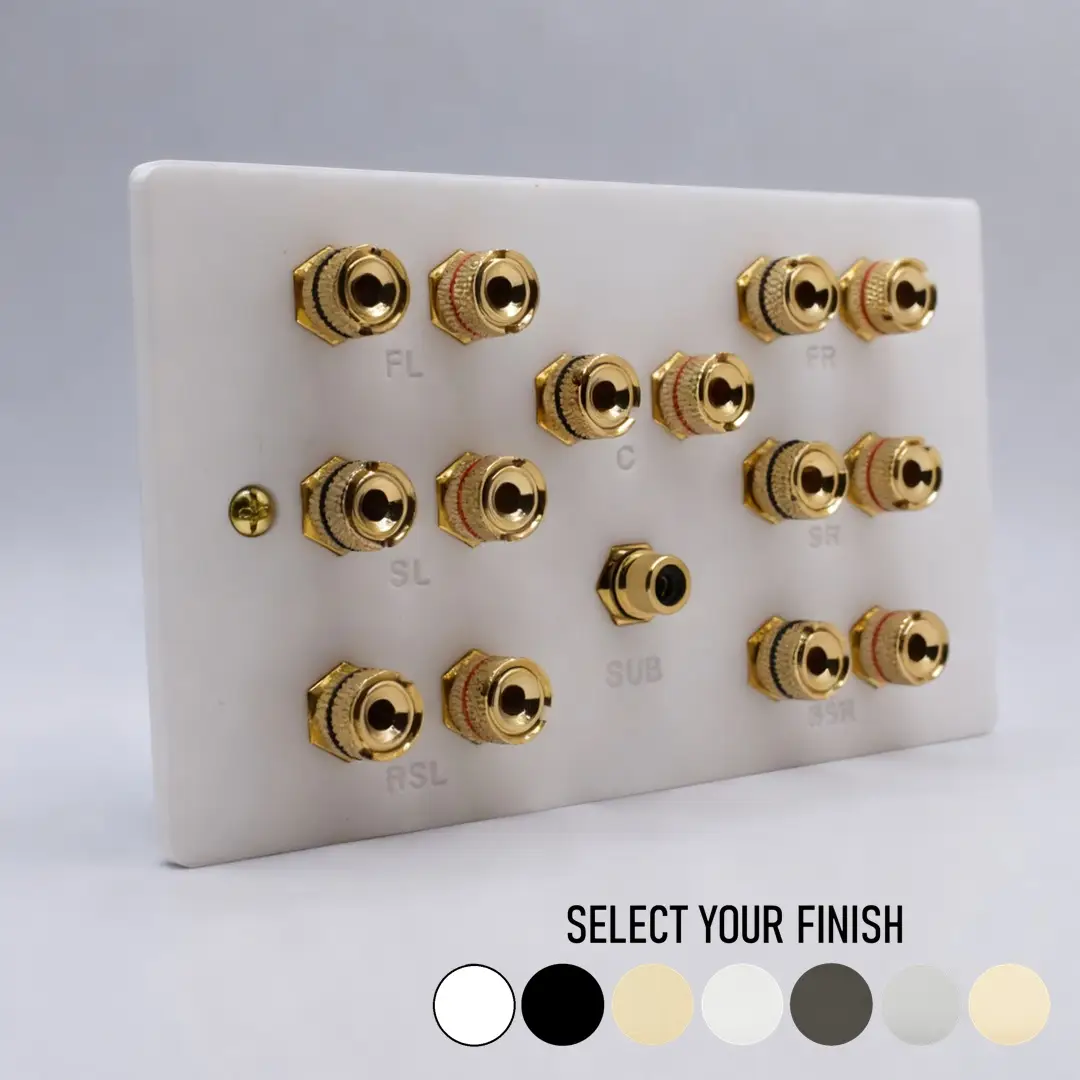
A double gang Dolby 7.1 speaker wall plate with 7 pairs of speaker terminal binding posts and a single subwoofer socket. Option to add an additionalย subwoofer socket to make it 7.2. The gold-plated binding posts accept bare cable and 4mm banana plugs for a solder free installation. Combine with...
Read More
February 23, 2026
Dolby 9.1 / 9.2 Speaker Connection Plate
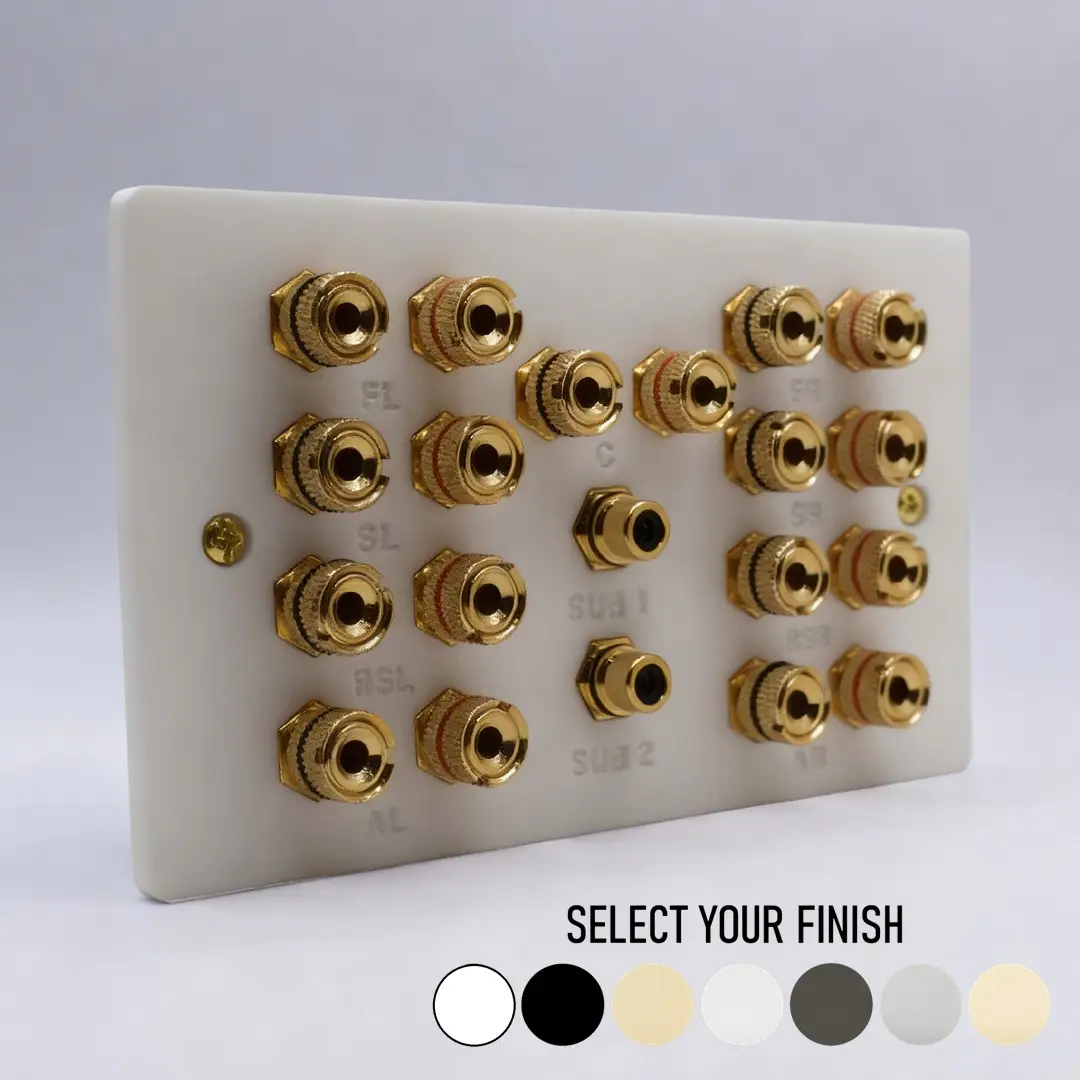
A double gang Dolby 9.1 speaker wall plate with nine pairs of speaker terminal binding posts and a single subwoofer socket. Option to add an additionalย subwoofer socket to make it 9.2. The gold-plated binding posts accept bare cable and 4mm banana plugs for a solder free installation. Combine with...
Read More
April 15, 2024
Dolby Atmos 5.1.2 / 5.2.2 Speaker Plate
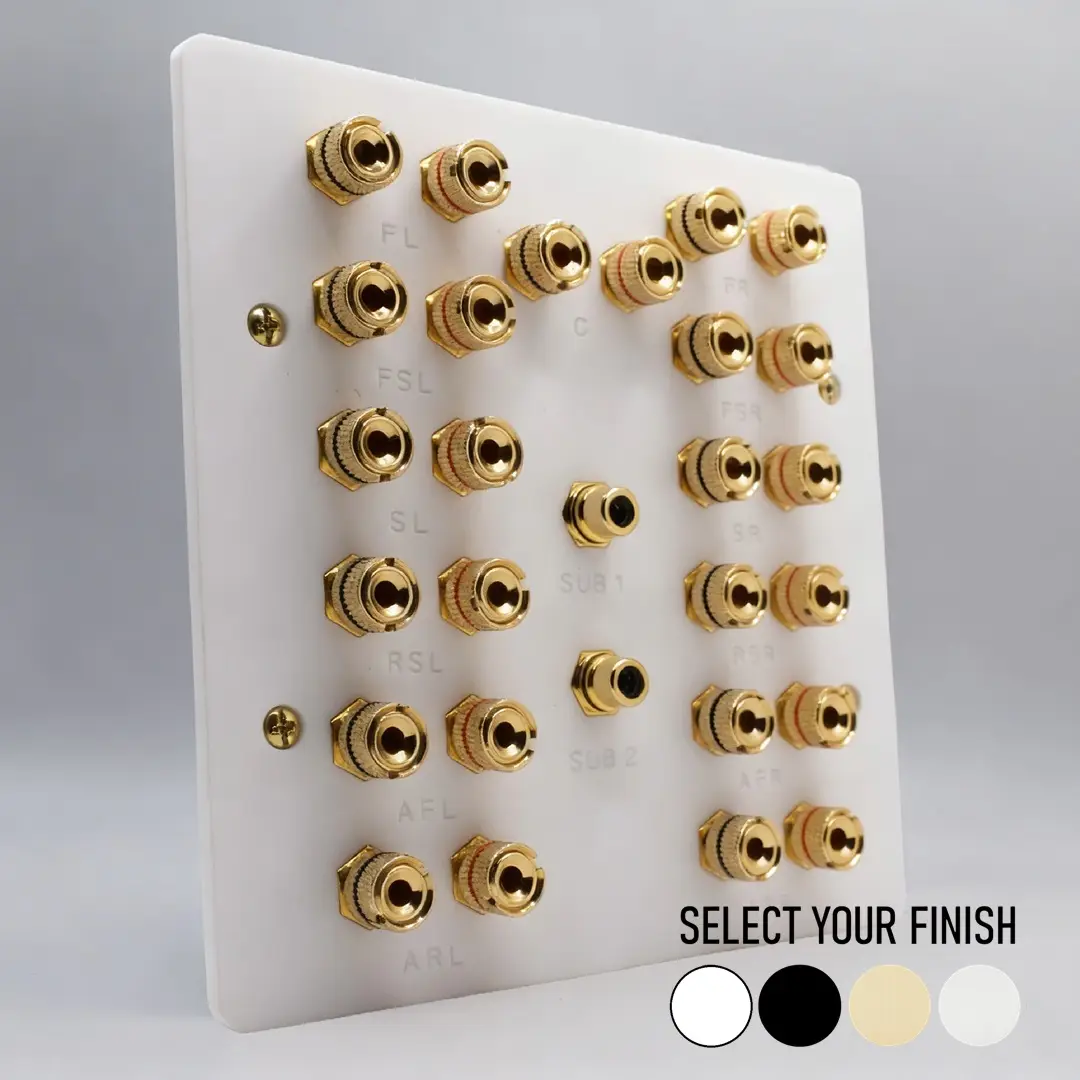
A double gang Dolby Atmos 5.1.2 speaker wall plate with seven pairs of speaker terminal binding posts and a single subwoofer socket. The binding posts are gold-plated and also accept 4mm speaker banana plugs. The connections on the back are the same as on the front of the plate, which...
Read More4. 5.1.2 Dolby Atmos (Ceiling)
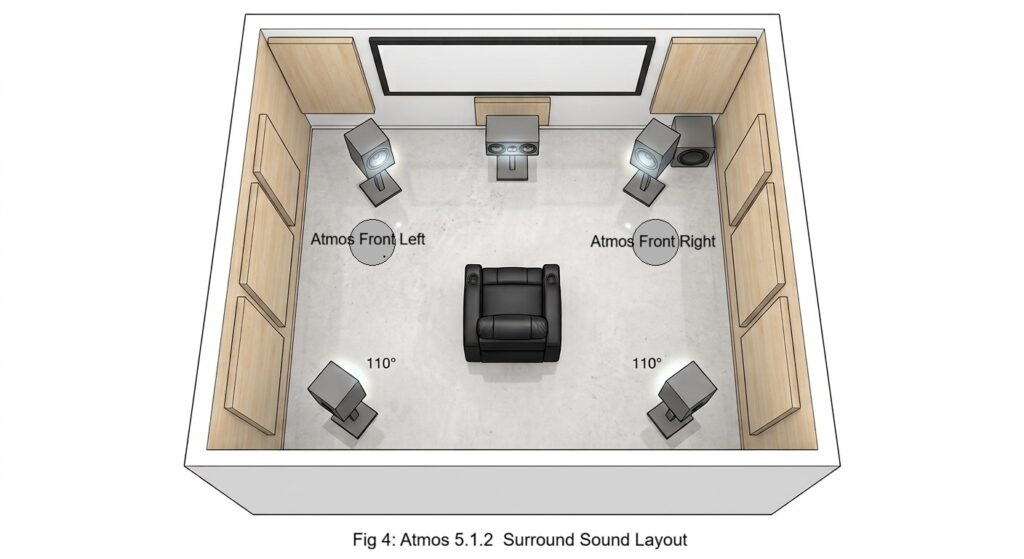
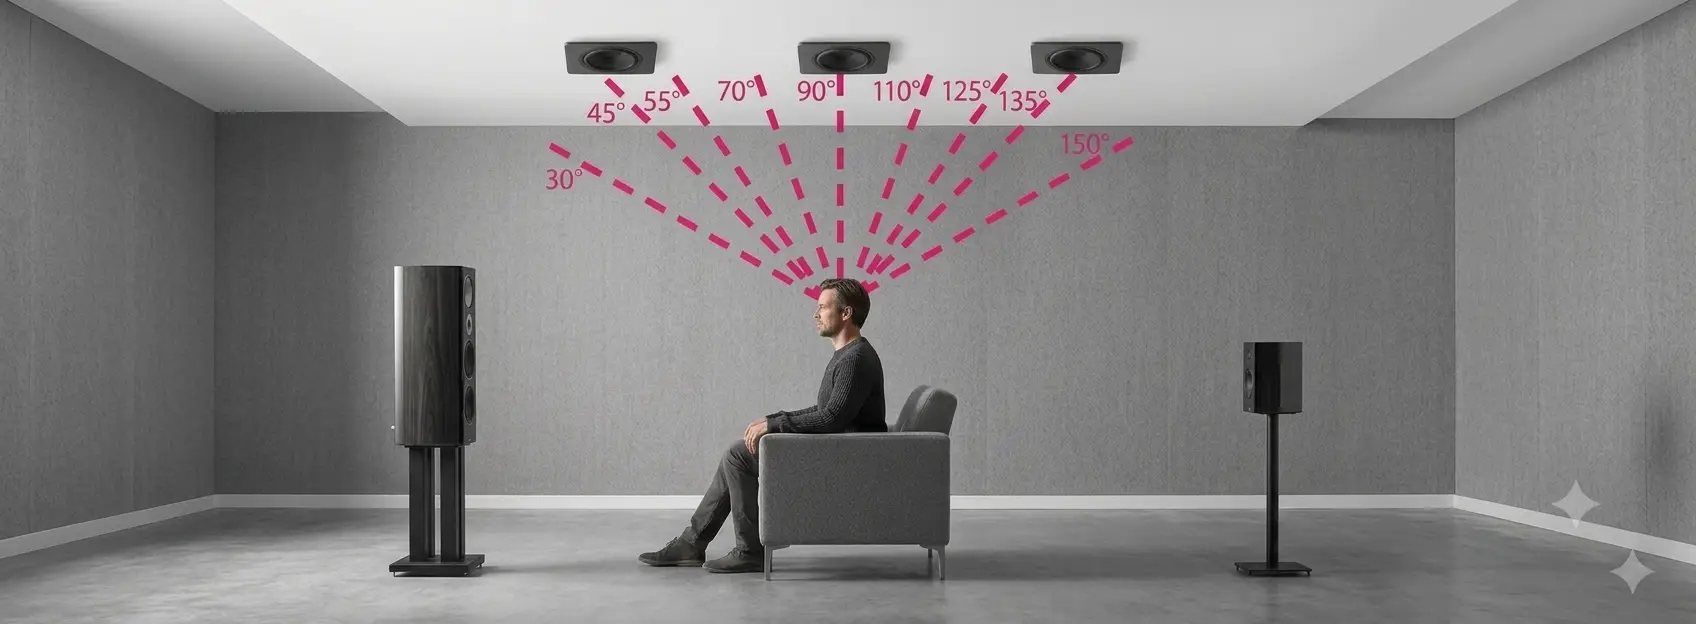
The entry point into immersive, three-dimensional audio. A .2 Atmos system adds two overhead height channels to the traditional 5.1 base.
Placement Notes:
- The system uses the foundational 5.1 floor layout (LCR, SL, SR, Sub).
- The perspective shifts slightly to showcase the geometric ceiling structure.
- A pair of Atmos speakers (Atmos Front L & Atmos Front Right) is installed in the ceiling grid, positioned forward of the listener (PLP) and slightly wider than the main Front L/R pair.

Fig 4: The 5.1.2 layout adapts the 5.1 floor base (LCR, SL, SR) and introduces two ‘Front Height’ speakers installed overhead in the ceiling grid.
For more in-depth information on speaker placement, please visit Dolby or download the Dolby Atmos 5.1.2 Home Cinema Speaker Guide
ย
5. 5.1.4 Dolby Atmos (Ceiling)
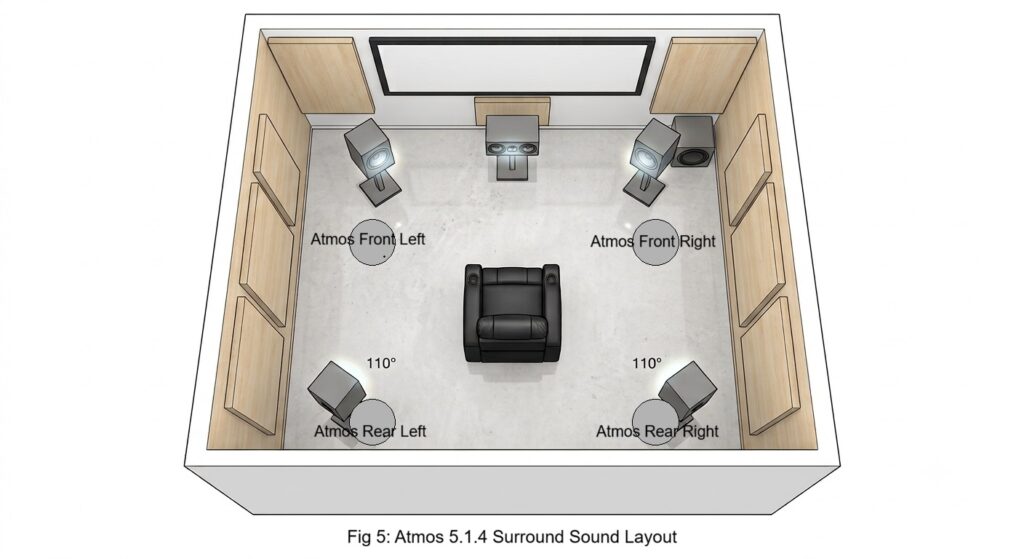
The classic “full” Atmos experience. This configuration adds four discrete height channels (two pairs) to the 5.1 base, creating a powerful overhead bubble.
Placement Notes:
- The system utilizes the 5.1 floor layout and the original Front Height (FH) ceiling pair from the .2 layout.
- Two additional Rear Height speakers (Atmos Rear L & Atmos Rear R) are installed in the ceiling grid, positioned symmetrically behind the listener.
- The four overhead speakers are arranged in a rectangular grid above the listening position, defining the complete “overhead bubble” crucial for object-based panning.

Fig 5: The 5.1.4 layout expands the overhead array, maintaining the ‘Front Height’ pair and adding a new, symmetrical ‘Rear Height’ pair behind the listener.
For more in-depth information on speaker placement, please visit Dolby or download the Dolby Atmos 5.1.4 Home Cinema Speaker Guide
ย
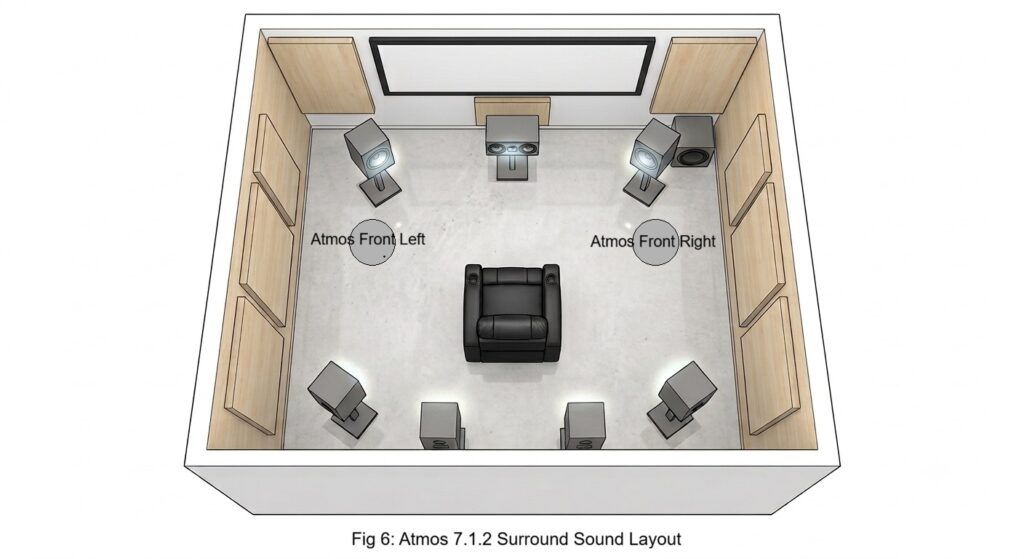
6. 7.1.2 Dolby Atmos (Ceiling)
A hybrid layout that combines the superior horizontal resolution of a 7.1 floor plan with basic .2 overhead coverage.
Placement Notes:
- This system utilizes the complete 7.1 floor-level layout (LCR, SL/SR, SBL/SBR, Sub) as shown in Fig 2.
- Two height speakers are installed flush in the ceiling (the FH pair).
- These overheads are placed in the Front Height position (forward of the sweet spot), identical to the ceiling positions used in the 5.1.2 layout (Fig 4).

Fig 6: The 7.1.2 layout combines the full 7.1 floor-level foundation with the introductory ‘Front Height’ pair on the ceiling.
For more in-depth information on speaker placement, please visit Dolby or download the Dolby Atmos 7.1.2 Home Cinema Speaker Guide
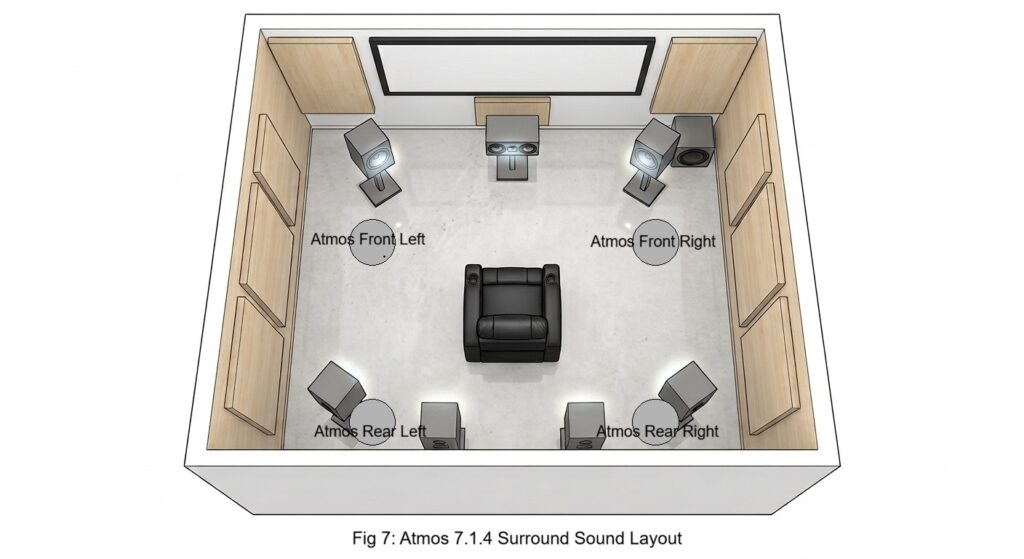
7. 7.1.4 Dolby Atmos (Ceiling)
A highly common and recommended high-end configuration. It merges the full 7.1 floor plan with the complete four-speaker overhead grid.
Placement Notes:
- The system uses the 7.1 floor layout and the specific ceiling architecture.
- The established Atmos Front Height (FH) and Atmos Rear Height (RH) speaker pairs are installed in the ceiling grid, creating the complete four-channel overhead array.
- All eleven channels (7 floor + 4 ceiling) work together to produce maximum spatial accuracy.

Fig 7: The 7.1.4 layout combines the 7.1 floor foundation with the complete four-speaker overhead grid (Front and Rear Heights).
For more in-depth information on speaker placement, please visit Dolby or download the Dolby Atmos 7.1.4 Home Cinema Speaker Guide
ย
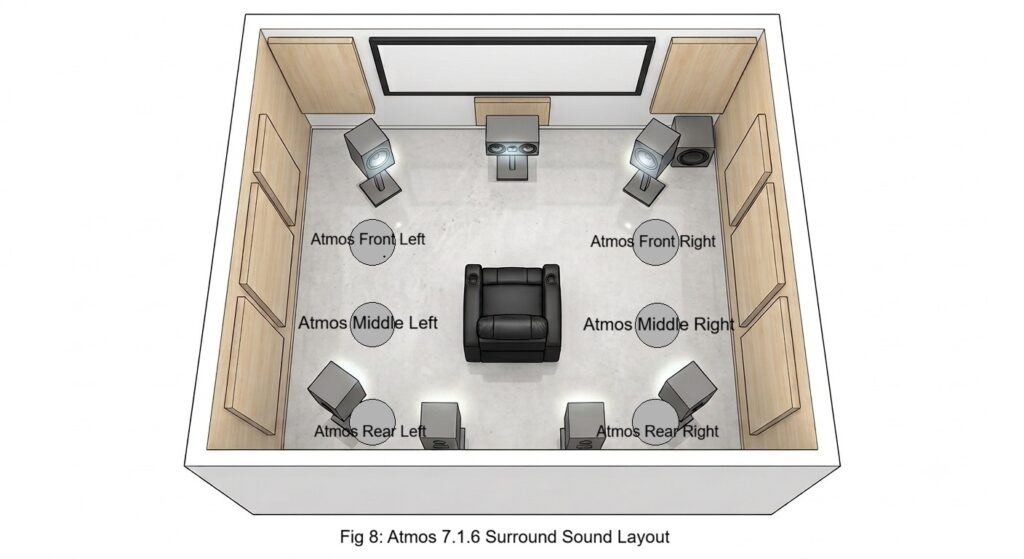
8. 7.1.6 Dolby Atmos (Ceiling)
The maximal immersion array for a standard theater footprint, adding a third pair of ceiling speakers (six overheads total) to a 7.1 base.
Placement Notes:
- The system uses the 7.1 floor layout and the existing Front and Rear Height pairs from the 7.1.4 setup.
- Two Top Middle speakers (TM Left, TM Right) are added to the ceiling structure.
- These new overhead speakers are positioned directly above the listener (the PLP), centred precisely between the Front Height and Rear Height pairs. This ensures seamless overhead panning and localisation.

Fig 8: The 7.1.6 layout defines the maximal ceiling array (Front, Top Middle, Rear pairs) while keeping the standard 7.1 floor-level foundation.
For more in-depth information on speaker placement, please visit Dolby or download the Dolby Atmos 7.1.6 Home Cinema Speaker Guide
ย
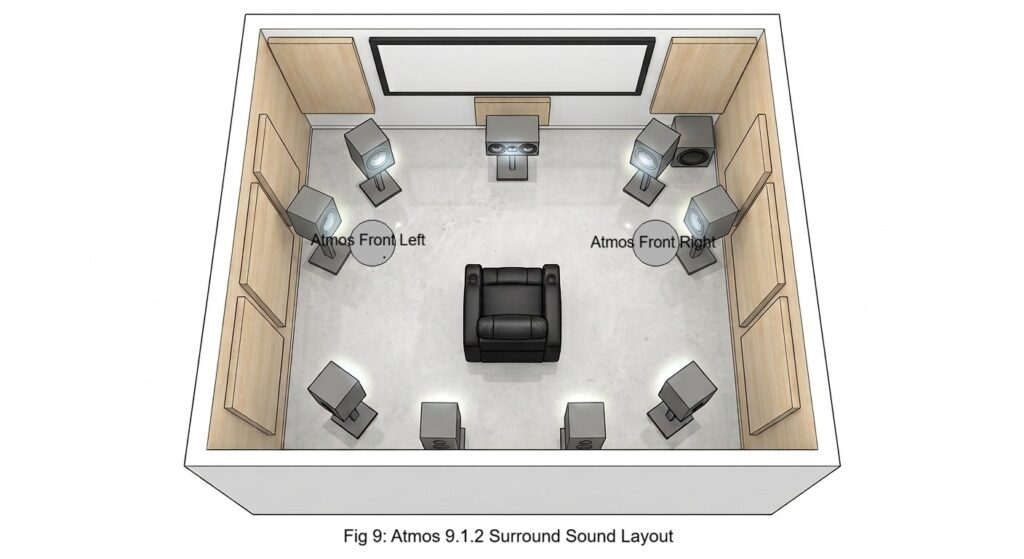
9. 9.1.2 Dolby Atmos (Ceiling)
A hybrid that prioritizes seamless side-to-front transition over extensive overhead coverage. It merges a 9.1 floor layer (including Front Wides) with a basic .2 ceiling pair.
Placement Notes:
- The system uses the 7.1 floor layout from Fig 2.
- Two Front Wide speakers (FWL, FWR) are added to the floor layer, matching the angled placement seen in the standard 9.1 diagram (Fig 3). This establishes the 9 floor channels.
- A single pair of height speakers is installed flush in the ceiling, positioned in the Front Height (FH) zone forward of the sweet spot.

Fig 9: The 9.1.2 layout combines the full 9-channel floor layer (LCR, Wides, SL/SR, Back Surrounds) with the introductory ‘Front Height’ ceiling pair.
For more in-depth information on speaker placement, please visit Dolby or download the Dolby Atmos 9.1.2 Home Cinema Speaker Guide
ย
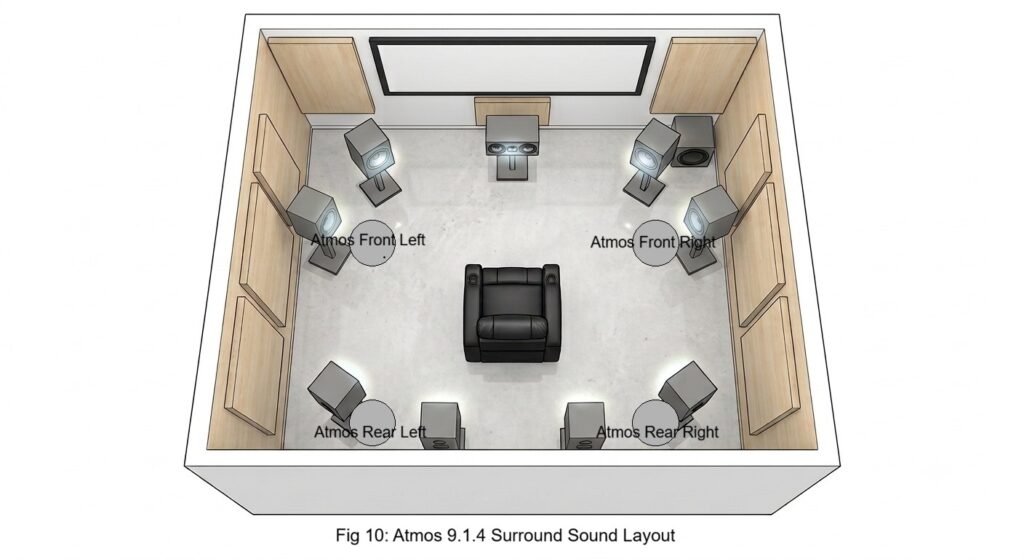
10. 9.1.4 Dolby Atmos (Ceiling)
A complex, powerful configuration that provides seamless coverage across both the horizontal and vertical planes. It merges the 9.1 floor layer with a full four-speaker overhead grid.
Placement Notes:
- This system uses the full 9.1 floor layout from Fig 3 (LCR, Wides, SL/SR, Back Surrounds).
- The established Front Height (FH) and Rear Height (RH) speaker pairs are installed in the ceiling grid, matching the placement defined in the previous .4 diagrams.
- This configuration provides exceptional resolution and seamless panning for object-based audio tracks.

Fig 10: The 9.1.4 layout combines the complex 9-channel floor layer (including Wides) with the complete four-speaker overhead grid (Front and Rear Heights).
For more in-depth information on speaker placement, please visit Dolby or download the Dolby Atmos 9.1.4 Home Cinema Speaker Guide
ย
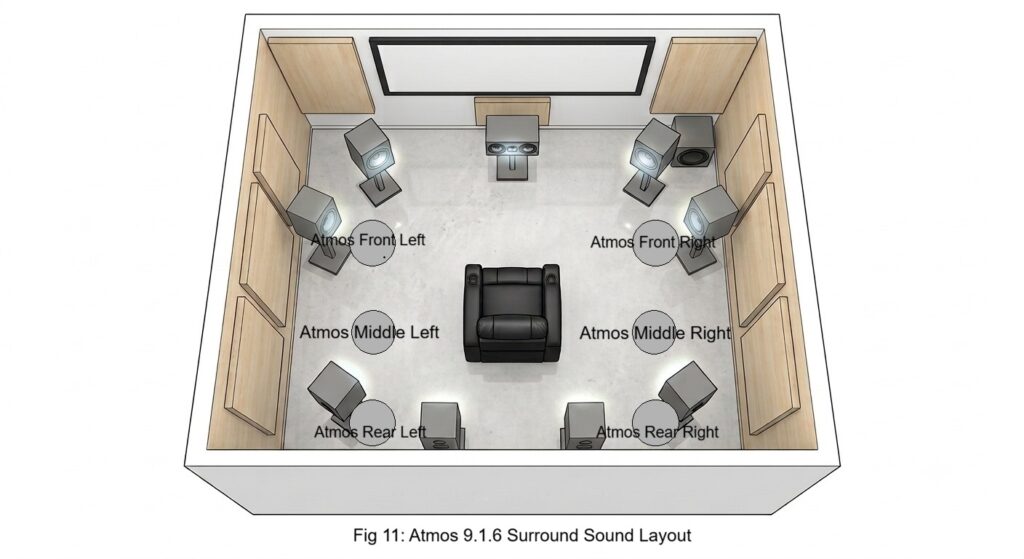
11. 9.1.6 Dolby Atmos (Ceiling)
The maximal immersion array, merging the complex 9.1 floor layer with the massive six-speaker overhead grid.
Placement Notes:
- This maximal system uses the full 9.1 floor layout from Fig 3 (including the critical Front Wides).
- The entire six-speaker overhead array is utilized: the Front Height pair, the Rear Height pair, and the critical Top Middle pair (positioned directly over the listener).
- The 15-speaker array defined here (plus subwoofer) represents the peak of object localization and seamless immersion for high-end residential cinema.

Fig 11: The ultimate 9.1.6 layout utilizes all 15 discrete channels: the full 9-speaker floor layer (including Wides) and the massive 6-speaker ceiling array (Front, Top Middle, and Rear pairs).
For more in-depth information on speaker placement, please visit Dolby or download the Dolby Atmos 9.1.6 Home Cinema Speaker Guide
Dolby Atmos Speaker Plates
April 15, 2024
Dolby Atmos 5.1.2 / 5.2.2 Speaker Plate
A double gang Dolby Atmos 5.1.2 speaker wall plate with seven pairs of speaker terminal binding posts and a single subwoofer socket. The binding posts are gold-plated and also accept 4mm speaker banana plugs. The connections on the back are the same as on the front of the plate, which...
Read More
April 15, 2024
Dolby Atmos 5.1.4 / 5.2.4 Speaker Plate
A double gang Dolby Atmos 5.1.4 speaker wall plate with nine pairs of speaker terminal binding posts and a single subwoofer socket. The binding posts are gold-plated and also accept 4mm speaker banana plugs. The connections on the back are the same as on the front of the plate, which...
Read More
February 23, 2026
Dolby Atmos 7.1.2 / 7.2.2 Speaker Wall Plate
A double gang Dolby Atmos 7.1.2 / 7.2.2ย speaker wall plate with nine pairs of speaker terminal binding posts and two subwoofer RCA sockets. The binding posts are gold-plated accept 4mm speaker banana plugs, spades and bare cable for solder free installation. The are the same on both side of...
Read More
November 17, 2025
Dolby Atmos 7.1.4 / 7.2.4 / 7.4.4 / 11.2 / 11.4 Speaker Plate
A Dolby Atmos 7.2.4 speaker wall plate complete with steel back box can also be used for 7.1.4. 11.2 and 11.4 setups. Fitted out with eleven pairs of speaker connection posts and a two subwoofer sockets. You can also add HDMI and Network sockets along with a further 2 subwoofers...
Read More
June 20, 2026
Dolby Atmos 9.1.4 / 9.2.4 / 9.4.4 / 13.2 / 13.4 Speaker Plate
A Dolby Atmos 9.2.4 speaker wall plate complete with steel back box can also be used for 9.1.4. 13.2 and 13.4 setups. Fitted out with thirteen pairs of speaker connection posts and a two subwoofer sockets. You can also add HDMI and Network sockets along with a further 2 subwoofers...
Read MoreLatest blog posts
Uncategorized
July 2, 2026
Top 3 ways to hide a TV in a bedroom.
Are you tired of feeling like your bedroom is dominated by a bulky, unsightly TV? Luckily, there are several clever and stylish ways to hide your TV in a bedroom without sacrificing functionality. In this blog, we will explore the top 3 ways to hide a TV in a bedroom,...
Read More